
Hi friends!
I spent the last week creating a breakdown tutorial of my last project S W I R L Y 3D for your learning pleasures!

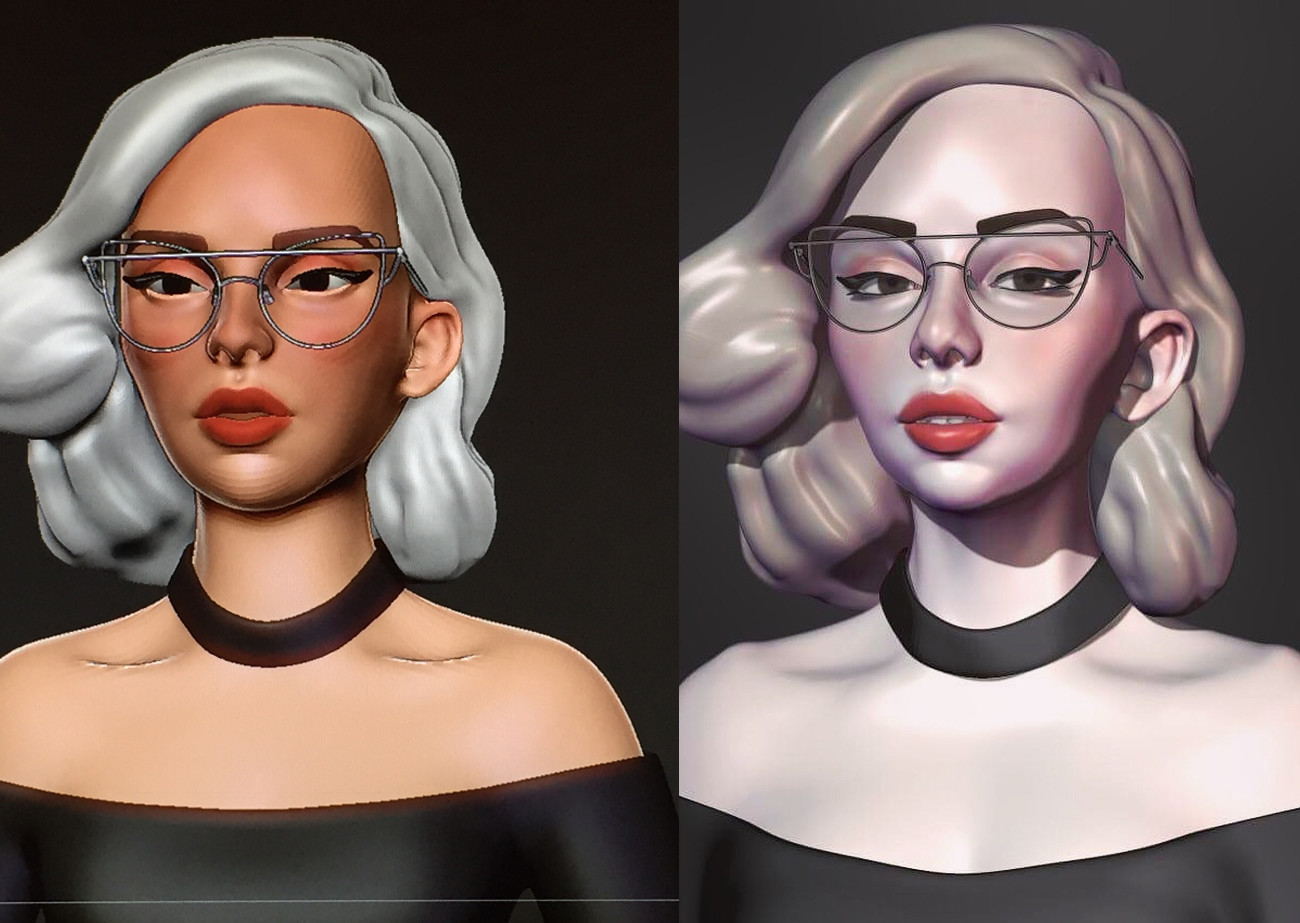
During my time creating this project I had two goals in mind. One was to continue exploring what I've recently learned about Xgen from my time at Bron Animation Studios, the other was to try to create a stylized but realistic feel to a model. The main reason I set my second goal was because I recently re-watched Big Hero 6, and got really inspired by seeing those characters again on screen and how real they felt, while still giving off a beautifully clean feel to the model.
I really wanted to create something with a lot of emotion and flow, and create a feeling similar to the one I got while watching this movie. So in this breakdown I'll be covering a broad overview of my workflow and methods, but mostly about how I went about making my creative decisions and how I over came some roadblocks I ran into.
Step 1: Reference Gathering!
So during this stage I pulled reference from tons of places. Usually I go to the movies, books, concepts, or anything else that recently inspired my work first, and then I'll spread my roots from there.
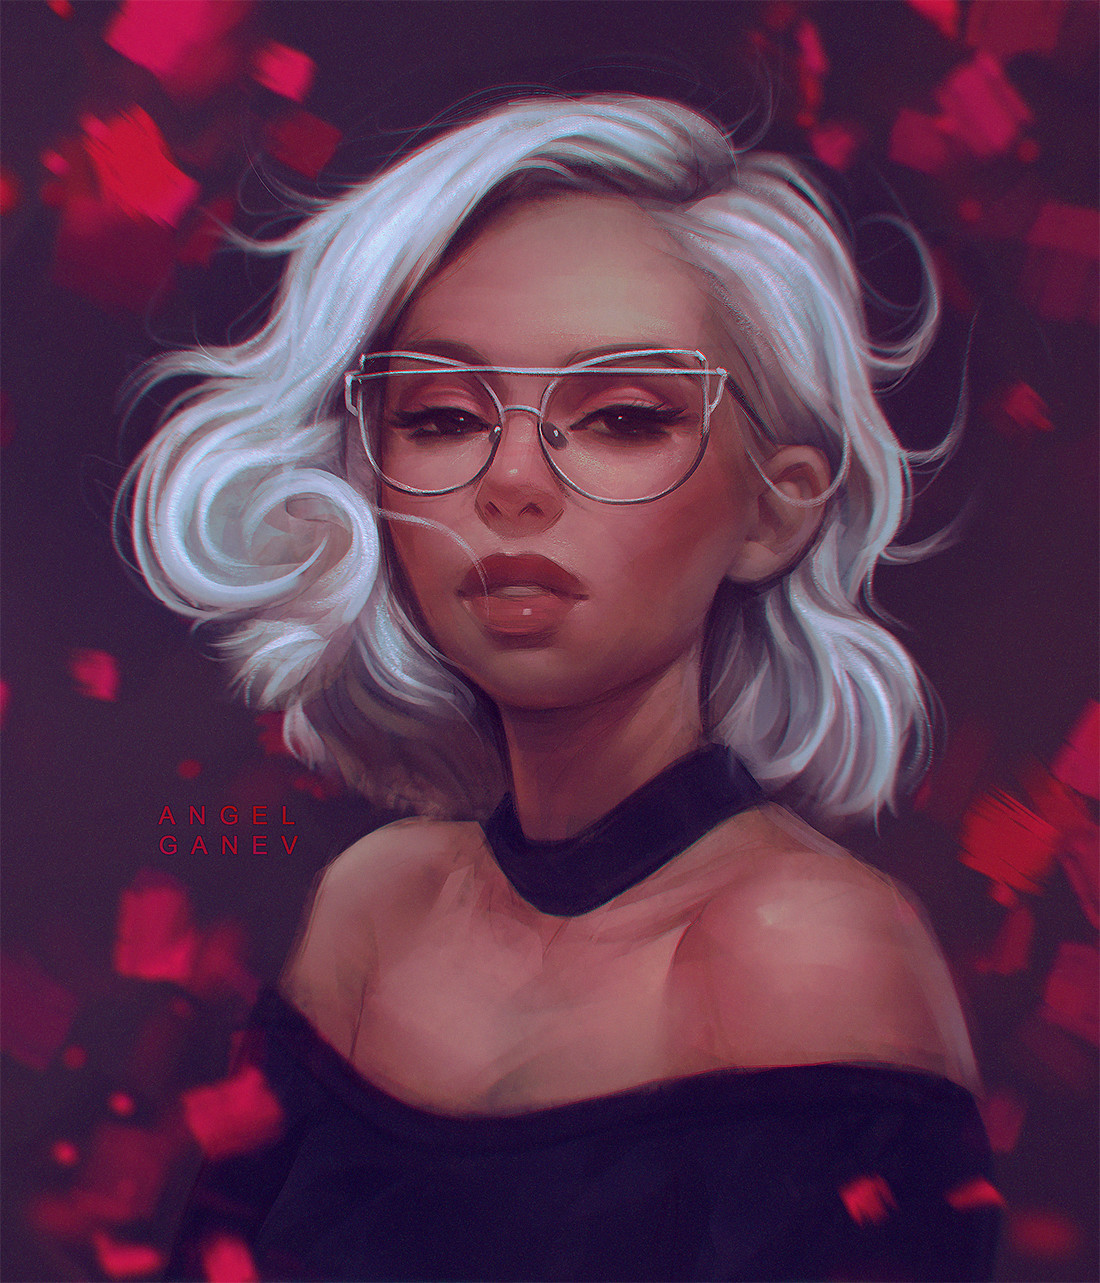
So first, the main concept. My first step was to examine this and decide where my challenges were going to lie and what things I needed more reference for and why.
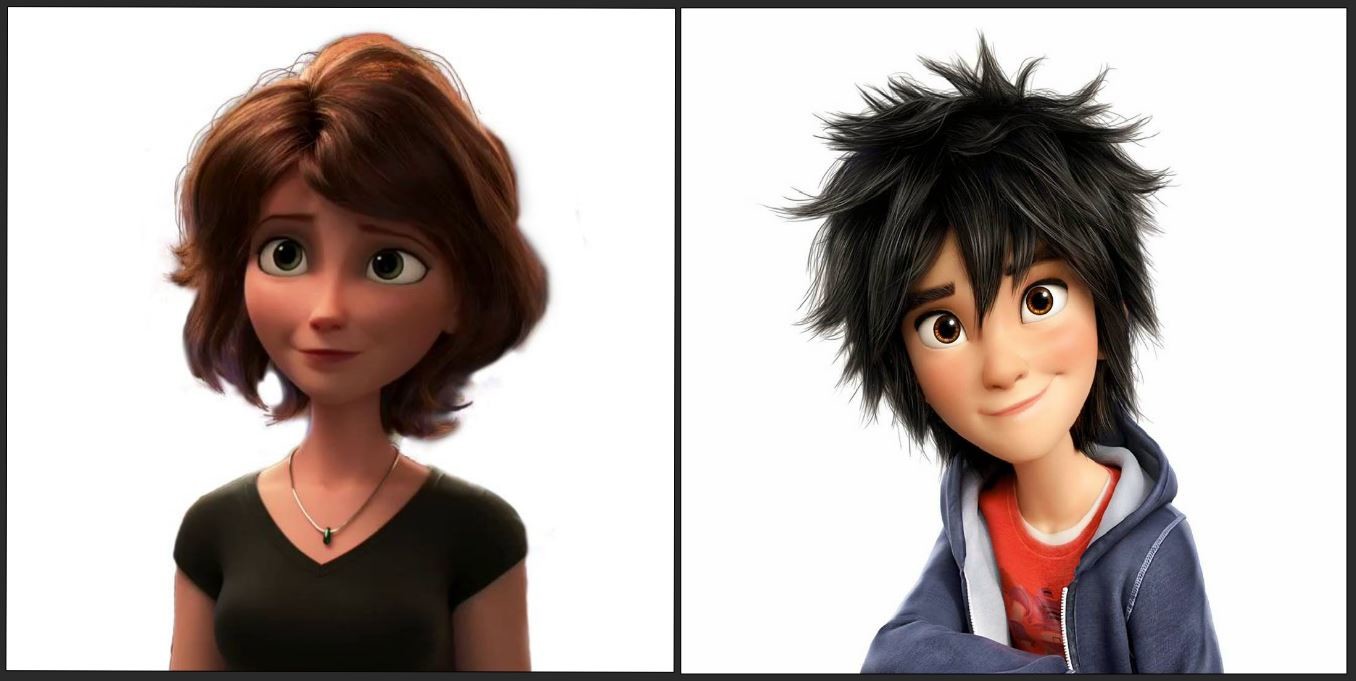
So of course the second place I found myself looking was at big hero 6 characters such as Hiro Hamada and Aunt Cass.
Once I had these at hand I realized I wanted to push this piece just a little more realistic with the skin shading, so I kept searching for even more reference. So usually when I'm looking for reference I try my luck with artists I currently follow or lookup to, or even just random google searches. I also found myself looking at The Incredibles 2 characters and their clothing because its absolutely mind blowing. I knew I wasn't going to see much of the clothes in this project which was a bummer but I still grabbed it anyways for some further inspiration and motivation.

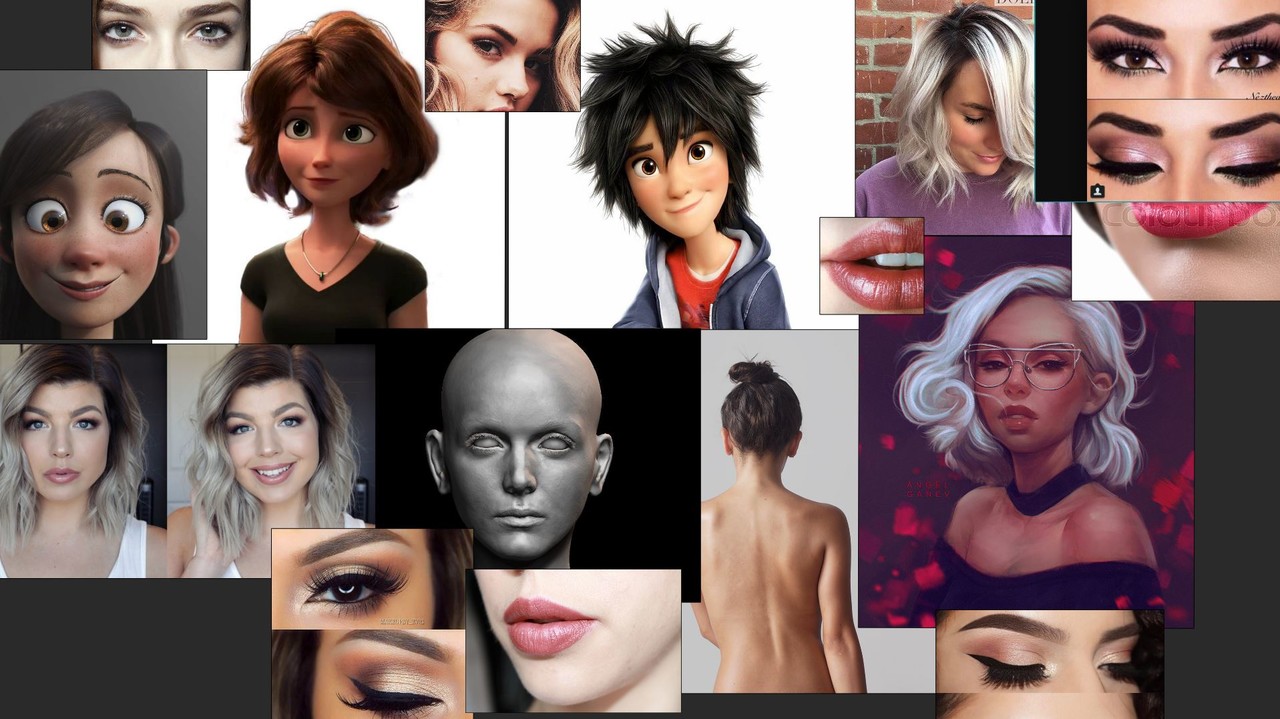
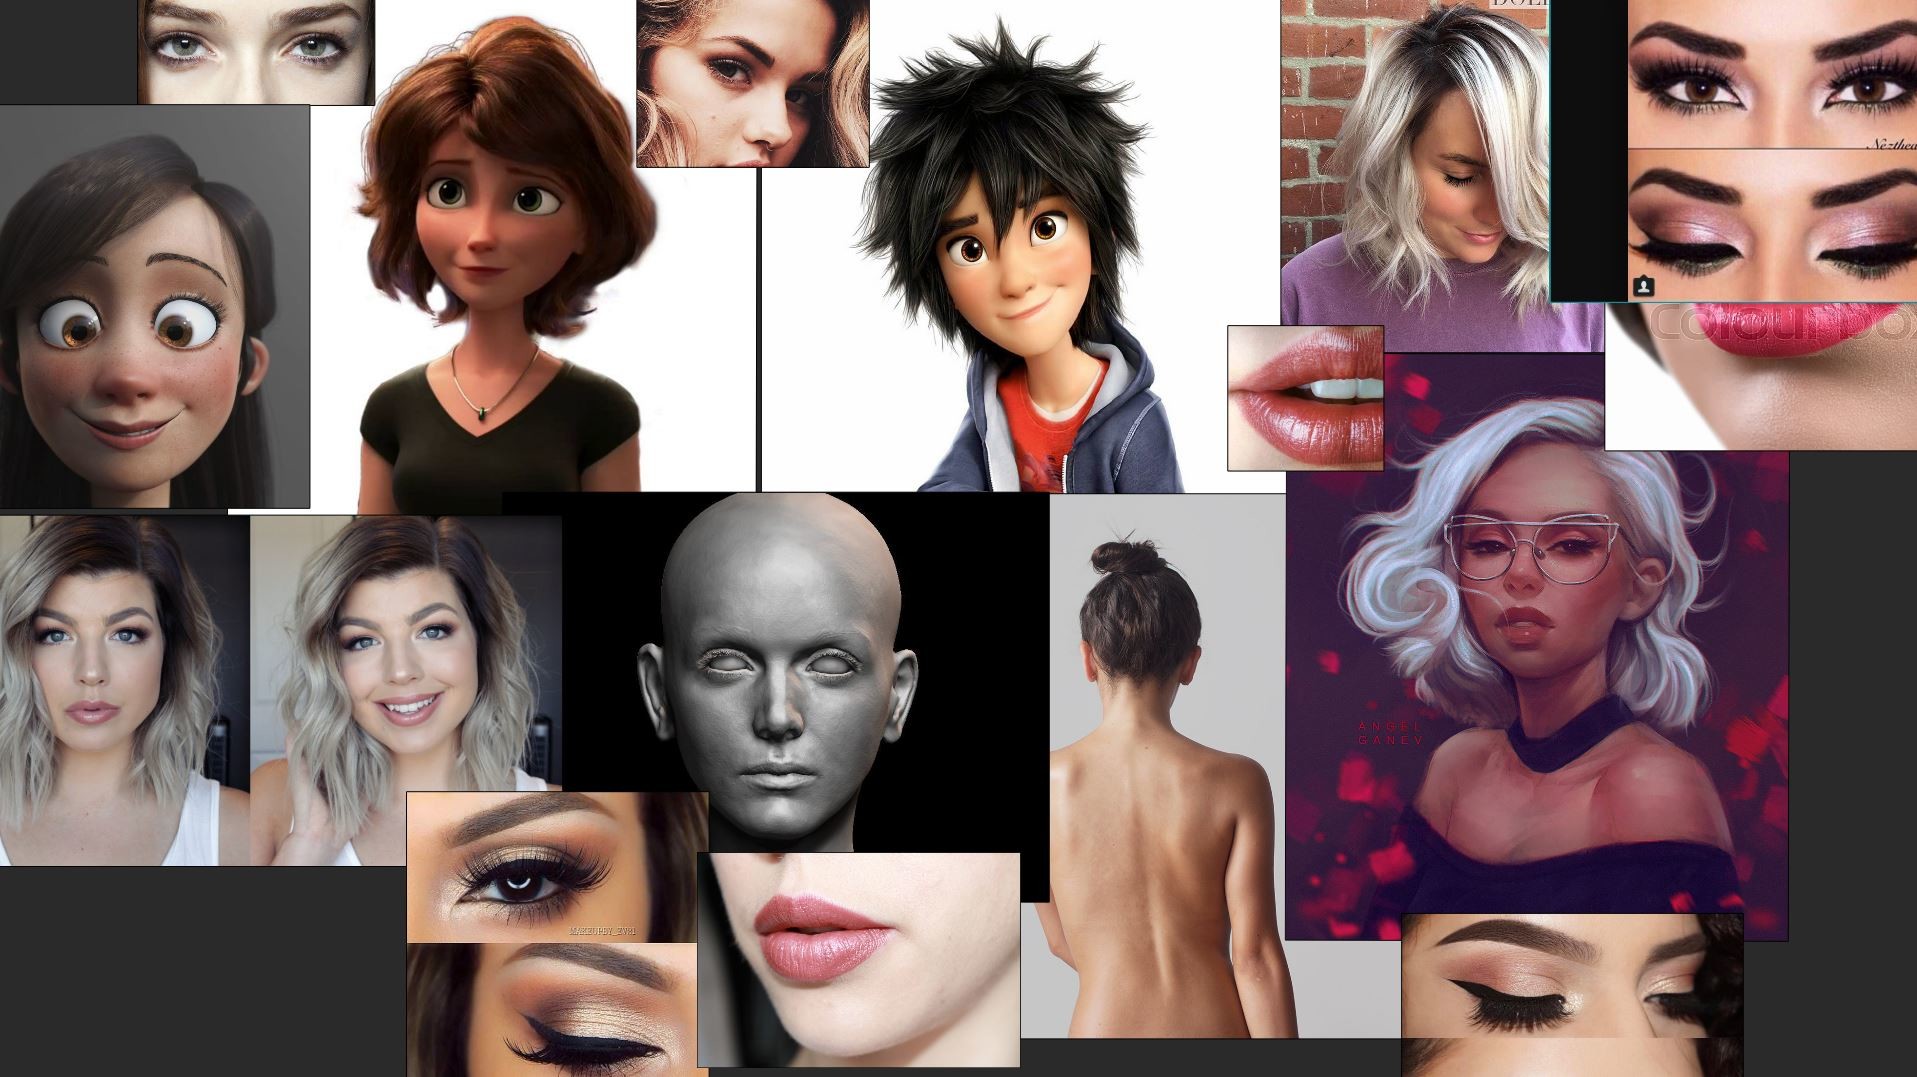
Now here's the rest of what I gathered for reference. I usually gather reference for anything and everything I can. This means anything I need for models, textures, lookdev targets and even groom styles. Sometimes Ill even grab some pose reference as well but I worked from the concept for this. In this you can see I found some for the white/ silver hair with the roots, as well as a beach curl hair style very similar to my concept. I also tried to find a realistic eyebrows I could match. The animated girl character I chose as great reference for the eyes I wanted to create. I found some makeup I really wanted to replicate the look of. I also grabbed a realistic greyscale girl face sculpt for some key anatomy reference (paired with other anatomy images). For the glasses I actually used my own to reference how they were built and textured, so unfortunately no photos of those! I recommend doing this any chance you get though, It's always much better to touch and turn your reference, this way you get a more thorough idea of how it should convert to 3D.
Step 2 : Base Proxy / Block In Sculpt
This is a really important part to modeling. It helps you to discover your proportions quick and easy before you go into high rez details and start moving into the higher poly counts. Some artists choose to create their base mesh in maya and experiment with proportions there. I'd say do this where you feel more comfortable. I prefer zbrush because I like the speed and flexibility of using dynamesh. I have a lot of freedom to experiment with my shapes before I put in the extra time into topologizing. I really value critiques during this time, and am always on the hunt for anyone's input. As well, don't be afraid to take a night away from the sculpt and come at it with fresh eyes the next day, I find this helps a lot to give you fresh perspective. Here's an example of where my piece went with just a days break inbetween.
My biggest tips during this stage is to really take your time to lock in those shapes. Usually I only take my model as high as I need to lock in all the major silhouette shapes and develop the eyelids and lips. I like to not take it too far because I'm not the biggest fan of re-projecting a lot of high rez detail back onto my clean topo later in the game, I'd rather just sculpt it all after.
I also keep my model completely symmetrical during this time as it makes the re-topo/uv stages so much easier and add asymmetry and pose later on.
While I block things I like to build hair volumes/eyebrows/eyelashes. This really helps to get a feel for if its completely matching your concept, even if your going to be doing your hair another way (ei. xgen). You can also use these block in forms to generate your guides with xgen which ill talk a little more about later. I also blocked in the glasses in Maya because I find my hard-surface modeling to be much faster there.
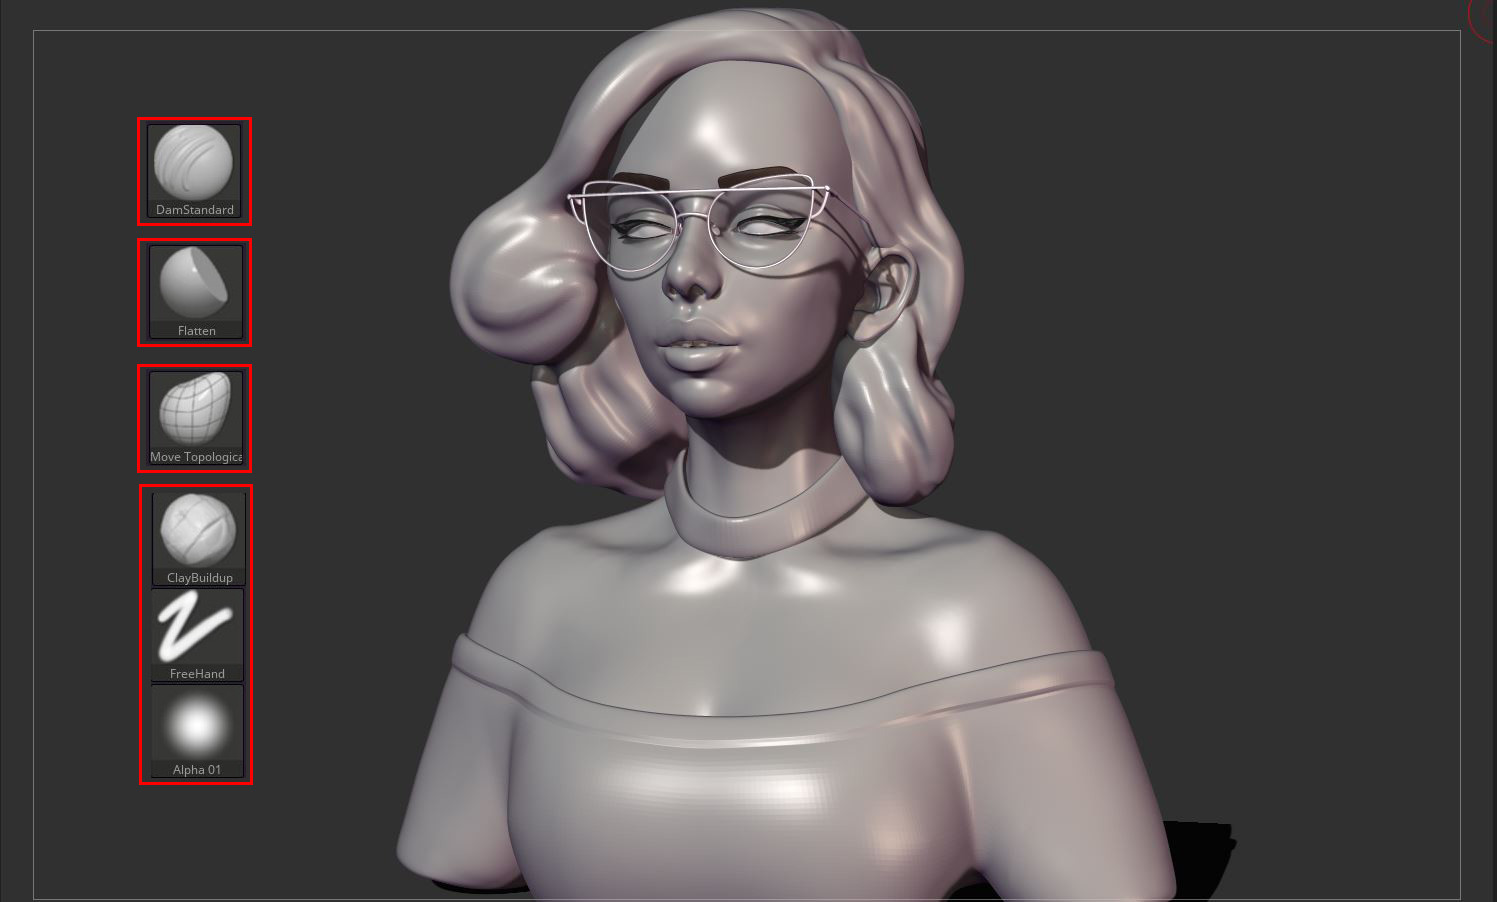
For my block in I usually use a mix the move topological tool, clay build up, flatten, and dam standard. These brushes are my power team when it comes to any sculpt so I like to stick with these ones for anything basic.
Step 3: Re-Topologizing and UVs
I always try to make sure I'm about 93% happy with my model and proportions before I take this into this next stage. You can do small tweaks here and there once the topo is in place but nothing super major that can disturb your line flow.
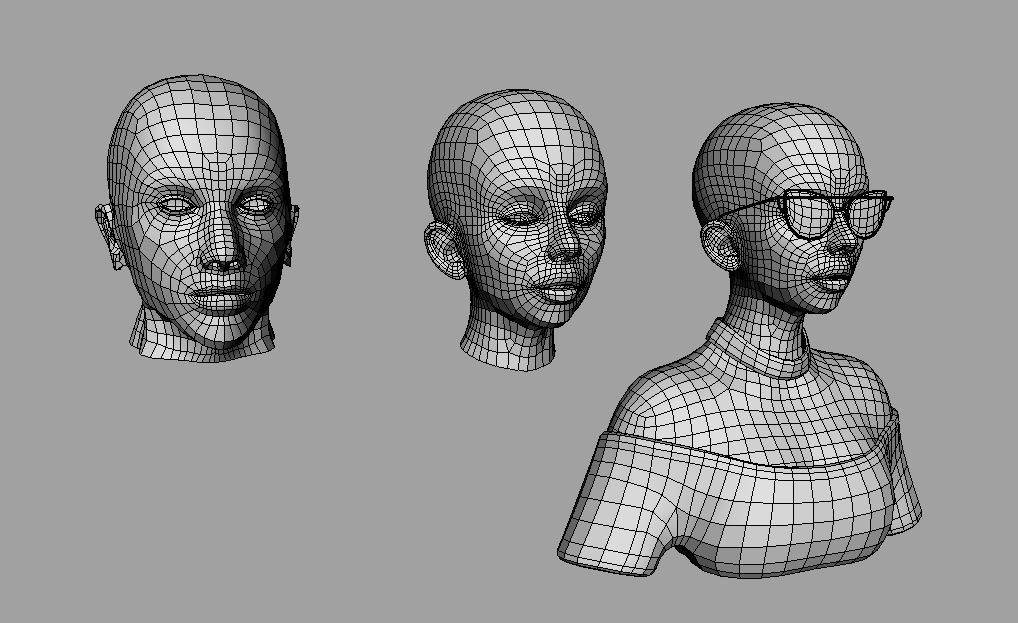
So that being said I started retopo. I decided since my focus for this project wasn't focused towards topo I'd take a little shortcut. So I took a female model I made a while ago and re-used what I could of the face topo which worked out nicely. How I did this was by chopping it off where I wanted to use and bringing this into zbrush and moving the topo around to match closely to my current sculpt and I projected my sculpt onto my clean model. I only had a few line flow issues that I corrected using the quad draw tool in maya. Below the neckline of the model I did end up creating new topology for as I didn't have anything to re-use. I recommend recycling any chance you get because it can save you time in the long run by re-using your old models.
Here's an image showing my initial base head, then it projected to match the sculpt, and then with the added and fixed topo.
The next step would be adding uvs now that I have my base mesh. I like to do this before I bring everything in zbrush because then its a little less back and forth between programs, but you can choose to do this after high rez detailing if you like.
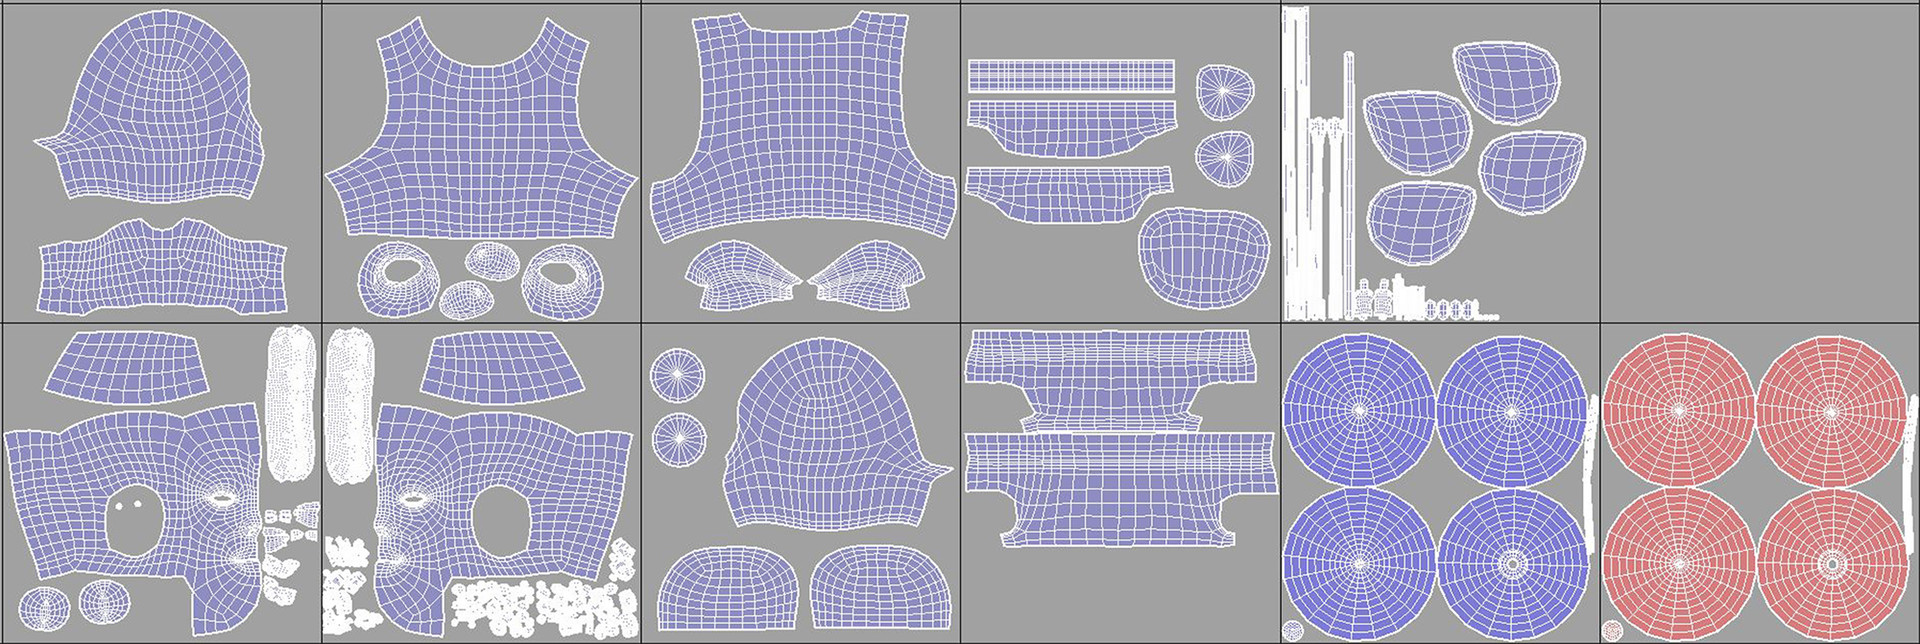
I also favor doing it at this stage because I have kept everything symmetrical so its much easier to unwrap one side of the model and mirror it over to save unwrap time.. Every second counts, plus its nice to have symmetry with your uvs for texturing! I then took my uvs and condensed them a bit more to fit on less tiles. I separated my uvs in my layout so I could easily recognize what was the body, the clothes, eyes, and glasses. These eye uvs I never ended up using because I created a completely procedural eye which I will talk about more in texturing.
Step 4: Hi-Rez Detailing with Zbrush and Mari
Now that the topology and uvs are complete, It's time to bring all the clean geometry into zbrush and project back my high rez sculpt details and add more. So I usually go about doing this by first creating polygroups on geometry that I added that's different than the corresponding sculpt. For this model I added deeper nostrils, deeper ear canals, mouth/throat/tongue, and rounder eye interiors. I do this so I can easily mask them out to keep the high rez detail from projecting onto them and making a mess. I did this easily by creating polygroups with "auto groups with uv" and then combining the main head polygroups together. Like so:
After doing this I then proceeded to project the high rez sculpt one subdivision at a time, I find doing it this way I get more accurate results.
After I have all my inital details back its time to add more! Except for this specific model I chose to skip secondary details all together. I chose to do this because after studying multiple stylized models I saw that what really sold the look and feeling was the fact that there was no wrinkling and just very smooth skin with super fine pore details. So I did make a few proportion fixes and clothing wrinkles at this stage but I actually took my model straight into Mari to start the tertiary details right away.
I decided to go with texture XYZs wonderful micro surface scans for fine displacement. Here's the link to the exact one I chose: Female Face 01
When you purchase one of these scans you get three HUGE photoshop files; displace, tertiary, micro. I brought these in photoshop to layer them into seperate RGB channels so I knew they would all line up properly when I started projecting in Mari.
I also liked doing it this way so I could only have one map, but use the blue channel and map that into the bump of my material for the micro details I don't need to displace and then map the red and green channels into the displacement to get the micro displacements. This is much easier to handle than 3 separate texture maps.
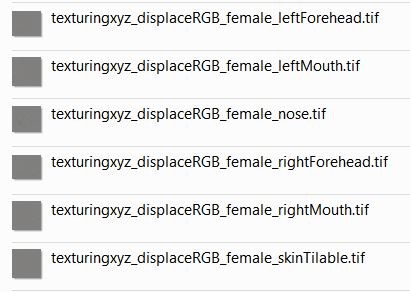
After doing this I also then split it up into 5 sections so that Mari could handle the map sizes; leftForehead, rightForehead, leftMouth, rightMouth, and nose. I also created a tileable texture out of a section on the cheek so I could use this to easily tile over my model to fill in any empty areas.
So now I am ready to bring my model and images into Mari and start projecting. I first used the tileable I created to tri planar project over the whole model, this helps to create a base to start from. I then started to project each corresponding map to its designated area and creating a new layer per section. I try to work as non destructively as I can so it's easier to fix problems later on. I then used other bits of the maps to project and cleanup the obvious tiling areas that I knew would be a problem and any transition problems. You can see my process in this timelapse video:
Step 5: Texturing
I started my texturing, seeing as I already had everything in Mari ready to go. Before I started the project I had decided I was going to texture the clothes in substance painter and the face and glasses in Mari. I chose to do this because I am a really big fan of the fabric library in substance painter. Its a nice fast process to find a fabric you like and it translates really well into Arnold after export. When I started texturing the face I decided to utilize the cross polarized images from Texture XYZ instead of creating my own. I knew that would take extra time away from the project that I couldn't spare. Here's the link to the set I purchased: Female Face 03
I decided to choose a girls face that had a little bit of makeup on it already. I did this because I didn't want too much color variation on her face, in hopes to keep her as stylized as possible but I did want SOME, so this is why I chose to project textures instead of painting by hand. It was hard to determine how much realistic skin features to include into this model, before I started to push her into a weird realistic realm that I didn't like.
I also created a tileable texture in photoshop out of the cheek skin for the diffuse, this is again to fill in any holes in the projections.
Here's a time lapse of my process:
After the face projection was done, I then went into painting the makeup. This is by far my favorite part about texturing a female face. I knew from my concept that my color palette needed to be pink so I found some styles to reference and went from that for painting everything. I kept everything on separate paint layers in Mari so it would be easy for me to isolate the IOR values of just the eye shadow, fully mask out the SSS on the eyeliner, and boost the gloss on the lipstick which I did end up having to do.

After the diffuse is completely finished all I had to do was use this map to remap the values and saturation to create all the other maps.
Here's the channels I ended up painting and using for just the face in Mari; diffuse, diffuse weight, displacement, ior, roughness, specular, sub surface color, sub surface weight.
I re-used the subsurface mask and inverted it to use it as a diffuse mask once I got into Maya. I also ended up painting an epidermal and subdermal map, but found I didn't need it once I got into the arnold skin shader. So instead I used the subdermal as my SSS radius instead and it worked out nicely with some tweaks.
Due to a limit on characters I had to split this into two parts. So stay tuned for my part 2 where I'll talk about my process for posing, lookdev, hair groom with xgen, lighting, and compositing/presentation! :)